How to Map A Squirrel Style Eyelash Extension Set
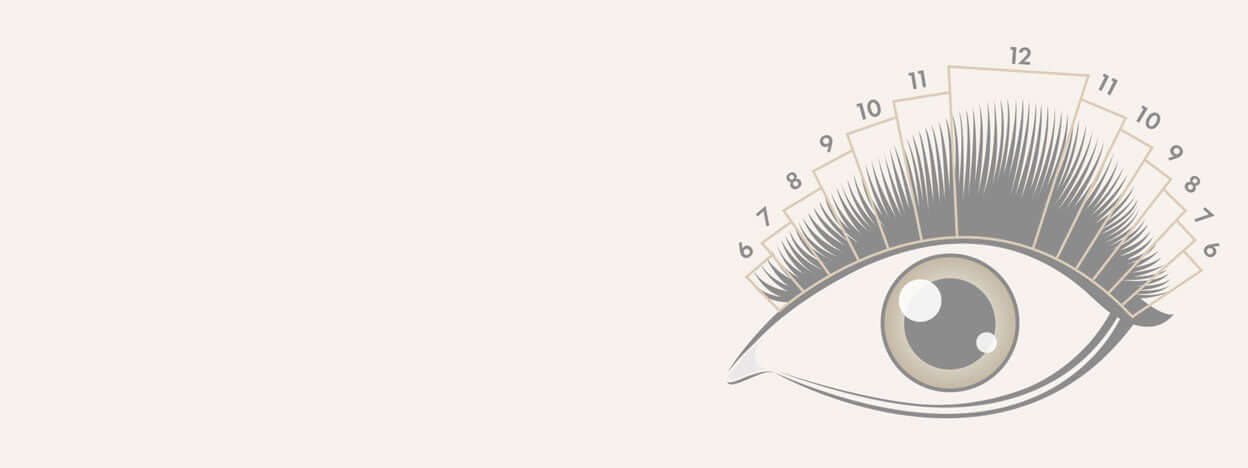

Table of Contents
How to Map a Squirrel Lash Set
Lash maps are vital to your lashing career. They keep your lash sets looking lovely and even across both eyes, prevent big steps between lengths and tailor each set to suit the individual client, so that everyone who visits your beauty salon leaves looking and feeling their absolute best!
A squirrel lash extensions style is one of the most versatile lash maps you can learn. Here, we’ll explain what squirrel lashes are, how to map them and which clients this style can suit. You can also read more about why lash mapping is important in our dedicated guide.
What Are Squirrel Lashes?
Squirrel lashes are all about enhancing what your clients already have, striking a balance between subtle and stunning. The longest lash extensions are placed towards the outer half of the eye, generally beneath the arch of the eyebrow, before the lengths taper down towards the outer corner.
This creates a soft, fluttery look with a lifted effect, making squirrel lashes a great option for clients who want to enhance their natural lashes without going overboard. Unlike a cat-eye map, the longest lengths do not sit at the outer corner.

How to Map a Squirrel Lash Extension Set
Before you begin, assess your client’s eye shape, brow position and natural lashes. The map provides a starting point, but the lengths and placement should always be customised to suit the individual client.
1. Mark the Inner Corner, Outer Corner and Centre
Start by marking the inner and outer lashes, and then make a mark in the centre of the eye. These points set the stage for the rest of your mapping process and help you create a balanced look across both eyes.

2. Position Your Longest Section
Next, make a mark halfway between the centre line and the outer corner lash. This is the area where your longest lash extensions will go.
The longest section will generally sit beneath the brow arch. Use this as a guide rather than a fixed rule, adjusting its position to your client’s eye and brow structure. This area creates the focal point of your squirrel lash set.

3. Divide the Outer Sections
Now that you have marked your longest segment, split the section towards the outer corner in half again, and then separate those sections into equal parts too. This helps keep your top line looking nice and smooth as the lengths become shorter.
Keep your mapping lines clear and follow the shape of your client’s lash line so that each section is easy to identify during application.

4. Reduce the Lengths Towards the Outer Corner
Map out your lengths from your longest lash extension length, dropping down by 1mm in each section until you reach the final section. This taper is what gives squirrel lashes their distinctive shape without placing too much length at the outer corner.

If you prefer, you can drop down through more lengths than shown in the example. Ultimately, we need to keep the natural lashes happy and healthy, so use suitably short, lightweight extensions on the inner and outer corners, where natural lashes tend to be shorter and finer.
Shorter lengths around 7–8mm can create a tapered finishing touch at the outer corner, provided they are suitable for your client’s natural lashes. One size does not fit all!

5. Map Towards the Inner Corner
Once you’ve mapped the outer half, map towards the inner corner using slightly larger sections than those at the outer corner. Gradually reduce the lengths as you move inwards to create a balanced transition.
You may wish to use more lash extension lengths than shown here. Consider how many natural lashes your client has, the lengths they can comfortably support and how pronounced an arch you want to create. Using additional lengths in small increments can help make the transition smoother.

Who Are Squirrel Style Lashes For?
A squirrel style lash map follows the brow arch and can complement the pattern of the client’s natural lashes, making it a versatile option for many clients. As with dolly style or cat-eye lashes, the final result depends on adapting the map to the individual.
Clients Who Want a Cat-Eye Alternative
Let’s say your client really wants a cat-eye style, but you know that placing the longest lashes at the outer corners may emphasise a downward appearance. A squirrel style can be a great alternative, keeping the longest section further in and tapering towards the outer corner.
Outer-Corner Lashes That Grow Downwards
For clients whose outer-corner lashes tend to grow downwards, the shorter outer sections can help avoid adding too much length and weight in that area. Carefully chosen lengths and curls can create a more balanced, lifted appearance.
Clients with High Brow Arches
Squirrel lashes can complement a pronounced brow arch, helping to frame the eyes. Position the longest section with both the brow and eye shape in mind rather than copying the same map for every client.
Clients with Close-Set Eyes
Placing the emphasis towards the outer half of the eye can help create the appearance of greater width for some clients with close-set eyes. Assess the whole eye shape and adjust the map to achieve a balanced result.
For more guidance on tailoring your sets, read our guide to choosing lash mapping styles for different eye shapes.
Aftercare Tips for Amazing Lash Retention
Once you’ve created your squirrel lash set, explain how your client can keep their extensions clean, comfortable and looking their best between appointments.
Gentle Cleansing
Encourage your clients to gently clean their lashes daily with a lash shampoo and cleansing brush to remove a buildup of oils, makeup and debris.

Brush Those Lashes
Advise your clients to use a clean lash brush to gently brush their lashes when dry, keeping them looking fluffy and tidy.
Avoid Rubbing or Pulling
Remind your clients to avoid rubbing or pulling on their lashes and to be mindful when applying makeup or skincare around the eye area. Recommend products suitable for eyelash extensions and follow the aftercare instructions for the adhesive used.
Regular Infill Appointments
Scheduling regular eyelash extension infills helps maintain the shape of the squirrel lash map as natural lashes shed and grow, keeping the set looking fresh.
With the right lash mapping and a little customisation, squirrel lashes can beautifully enhance your client’s natural features. Keep the longest section before the outer corner, taper the lengths smoothly and always choose extensions that suit the natural lashes. Happy lashing!
Check out these featured products